

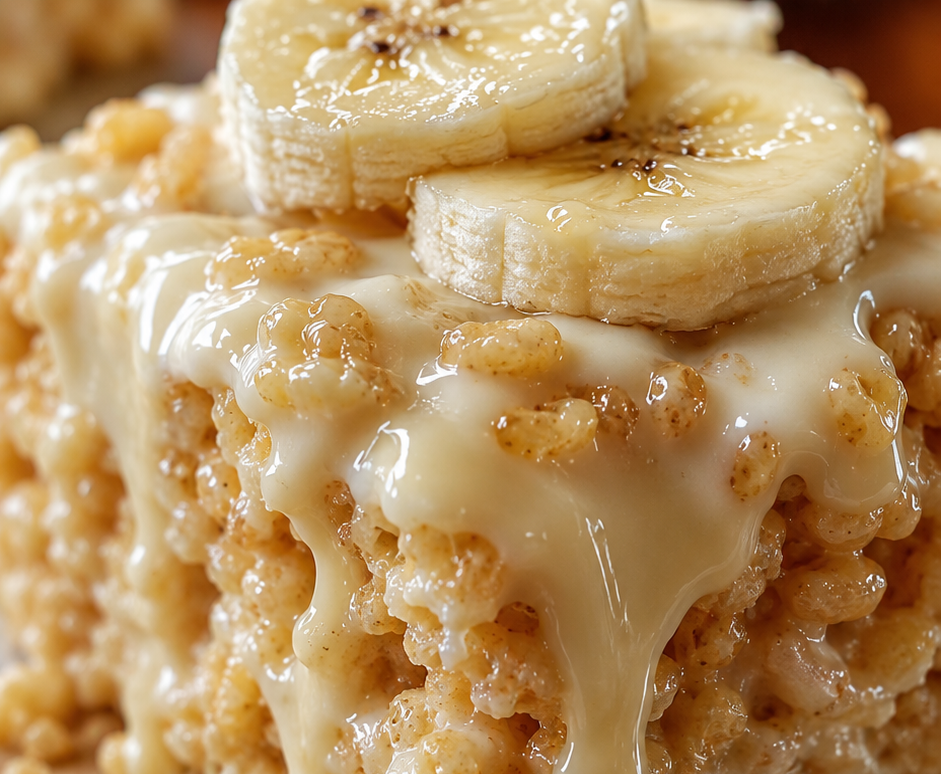
If you’re craving the creamy comfort of banana pudding but want the fun crunch of a Rice Krispies treat, this recipe delivers both in one bite. Sweet banana flavor meets gooey marshmallows and crispy cereal for a dessert that feels nostalgic yet exciting.
These no-bake bars come together in minutes and look beautiful on any dessert table. Perfect for potlucks, family movie nights, or when you need a quick homemade treat that wows without the oven.
Quick Recipe Snapshot
- Prep Time: 10 minutes
- Cook Time: 5 minutes (stovetop melting)
- Total Time: 45 minutes (including chill)
- Servings: 12–16 bars
- Difficulty: Beginner-friendly
- Best For: Parties, lunchbox snacks, potlucks, busy weeknights
- Main Flavor Notes: Sweet banana, buttery marshmallow, crisp cereal with vanilla wafer crunch
Why You’ll Love This Banana Pudding Rice Krispies
- Perfect texture contrast — Soft, chewy marshmallow base with crispy Rice Krispies and crunchy wafer pieces.
- Real banana flavor — Instant pudding mix delivers consistent taste without fresh bananas turning brown.
- Ready fast — No baking and minimal hands-on time, ideal for last-minute needs.
- Kid-approved and crowd-pleasing — Sweet, fun, and easy to portion for all ages.
- Make-ahead friendly — Tastes even better after a short chill and holds up well for gatherings.
- Pinterest-perfect — Bright yellow hue and wafer garnish make stunning photos.
What Is Banana Pudding Rice Krispies?
Banana Pudding Rice Krispies blends two classic American desserts: Southern-style banana pudding and classic marshmallow cereal treats. Instead of traditional vanilla wafers layered with cooked pudding and fresh bananas, this version folds banana pudding mix right into the melted marshmallow mixture for even banana flavor in every bite.
The result is a soft-set bar with creamy banana notes, crispy cereal texture, and pops of vanilla wafer crunch. It works beautifully because the dry pudding mix thickens and flavors the marshmallow base without making it soggy. Beginners love it because the steps stay simple and forgiving.
Recipe Inspiration
This treat draws from beloved American comfort foods rather than one specific cuisine. Classic banana pudding brings creamy, nostalgic sweetness while Rice Krispies treats add playful crunch and ease. The combination feels natural — both desserts rely on simple pantry staples and deliver big flavor with little effort. Home cooks created this fusion to enjoy banana pudding flavors in a portable, no-mess bar form.
Ingredients You’ll Need
Base
- 6 cups Rice Krispies cereal: Provides the signature light crunch.
- 1 (10 oz) bag mini marshmallows: Creates the sticky, gooey binder.
- 4 tablespoons unsalted butter: Adds rich flavor and smooth melting.
- 1 (3.4 oz) package instant banana cream pudding mix (dry): Delivers concentrated banana flavor and subtle thickening.
- 1 teaspoon vanilla extract: Enhances warmth and rounds out the banana notes.
Mix-ins and Topping
- ¾ cup crushed vanilla wafers: Gives authentic banana pudding texture and extra crunch.
- 2–3 ripe bananas, thinly sliced (optional, for layering): Adds fresh banana moisture and visual appeal.
- ¼ cup white chocolate chips or melting wafers, melted (for drizzle): Creates a pretty finish and extra sweetness.
- Extra whole vanilla wafers for garnish: Makes each bar look bakery-worthy.
How to Make Banana Pudding Rice Krispies
Prepare your pan Lightly grease a 9×13-inch baking dish with butter or cooking spray. This prevents sticking and makes clean removal easy.
Melt the base Place butter in a large pot over medium-low heat. Add marshmallows and stir frequently until mostly melted, about 3–4 minutes. Stir in the dry banana pudding mix and vanilla extract. Continue stirring until the mixture turns a lovely pale yellow and becomes smooth. Work quickly — the pudding mix thickens it slightly.
Combine with cereal Remove from heat. Pour in Rice Krispies cereal and crushed vanilla wafers. Fold gently with a spatula until evenly coated. The mixture will be sticky but manageable.
Press and layer Transfer to the prepared pan. Press firmly and evenly with buttered hands or parchment paper. If using, gently press banana slices into the top. Drizzle with melted white chocolate and press a few whole wafers on top for garnish.
Chill and cut Let cool at room temperature for 10 minutes, then refrigerate for 20–30 minutes until firm. Cut into squares or bars with a sharp knife. Serve and enjoy!
The Simple Cooking Science Behind This Recipe
Melting marshmallows low and slow prevents them from becoming tough or overly chewy. The dry instant pudding mix absorbs some moisture while releasing banana flavor evenly as it warms. This creates balanced sweetness without a separate pudding layer that could make the bars soggy.
Pressing the mixture firmly while still warm helps the treats hold their shape once cooled. Chilling sets the structure so the bars slice cleanly without crumbling. Acid from the pudding mix also helps balance the rich marshmallow sweetness for a more complex, crave-worthy bite.
Expert Tips for Best Results
- Use fresh marshmallows for the best gooey texture — stale ones lead to harder treats.
- Work fast once the cereal goes in so the mixture doesn’t seize before pressing.
- Grease your hands or spatula well to prevent sticking during pressing.
- For brighter color, choose banana cream pudding over plain vanilla.
- Don’t skip the short chill — it improves slicing and flavor melding.
- Taste the melted marshmallow mixture before adding cereal and adjust vanilla if needed.
- Store wafers in an airtight container so they stay crisp until use.
Easy Variations
- Chocolate banana — Add ½ cup mini chocolate chips with the cereal and use chocolate pudding mix.
- Peanut butter twist — Swirl in ⅓ cup peanut butter with the melted marshmallows for nutty depth.
- Lighter version — Use half the butter and low-sugar marshmallows for a gentler treat.
- Berry banana — Fold in ½ cup freeze-dried strawberries with the cereal.
- Extra fancy — Layer sliced bananas between two thinner cereal layers for a pudding-like center.
- Party size — Make in a 9×9 pan for thicker, bakery-style bars.
What to Serve With Banana Pudding Rice Krispies
Serve these bars with fresh fruit salad, iced coffee, or cold milk for kids. They pair well with grilled sandwiches at lunch or sit beautifully next to brownies and cookies on dessert tables. For potlucks, wrap individually for easy grabbing. Add them to picnic baskets or holiday cookie trays for a fun twist. They also make a sweet afternoon snack with a cup of tea.
How to Store and Reheat
Store in an airtight container at room temperature for up to 3 days. For longer storage, keep in the fridge up to 5–6 days. The bars stay chewy but may firm slightly when cold.
Freezing is possible but not ideal — wrap tightly and freeze up to 1 month. Thaw at room temperature; texture softens but may lose some crispness. Avoid microwaving whole bars as they can become overly sticky. Best enjoyed at room temperature.
Make-ahead tip: Prepare the full pan the night before and cut just before serving.
Common Mistakes to Avoid
- Melting on high heat — This makes marshmallows stringy and hard to mix. Stick to medium-low.
- Adding too much pudding mix — It can make the base overly thick and chalky. Half to full packet works best.
- Loose pressing — Bars fall apart easily if not compacted well.
- Using overripe bananas on top without chilling — They can release too much moisture.
- Skipping grease on the pan and tools — Everything sticks and tears.
- Cutting too soon — Warm bars crumble; a short chill prevents this.
Nutrition Facts
Per bar (based on 16 servings): Approximately 180–220 calories, 5–7g fat, 35–40g carbohydrates, 1–2g protein. Values are approximate and will vary based on exact brands and portion sizes.
Frequently Asked Questions
Can I use regular vanilla pudding instead of banana? Yes, but add ½ teaspoon banana extract for true banana flavor.
Do I need fresh bananas? No. The pudding mix provides flavor. Fresh slices are optional for visual appeal and extra moisture.
How do I make this gluten-free? Use gluten-free Rice Krispies, gluten-free vanilla wafers or omit them, and check your pudding mix.
Can I make these ahead for a party? Absolutely. Make up to 2 days ahead and store covered. They hold texture well.
Why are my treats hard? Overcooking the marshmallows or using old cereal often causes hardness. Melt gently and use fresh ingredients.
Can I use a microwave instead of stovetop? Yes. Microwave butter and marshmallows in 30-second bursts, stirring between, then add pudding mix.
These Banana Pudding Rice Krispies bring together creamy nostalgia and crispy fun in one easy recipe. Save this one for your next gathering or sweet craving. Try the chocolate or peanut butter variation and see which becomes your family favorite. Happy making!
