



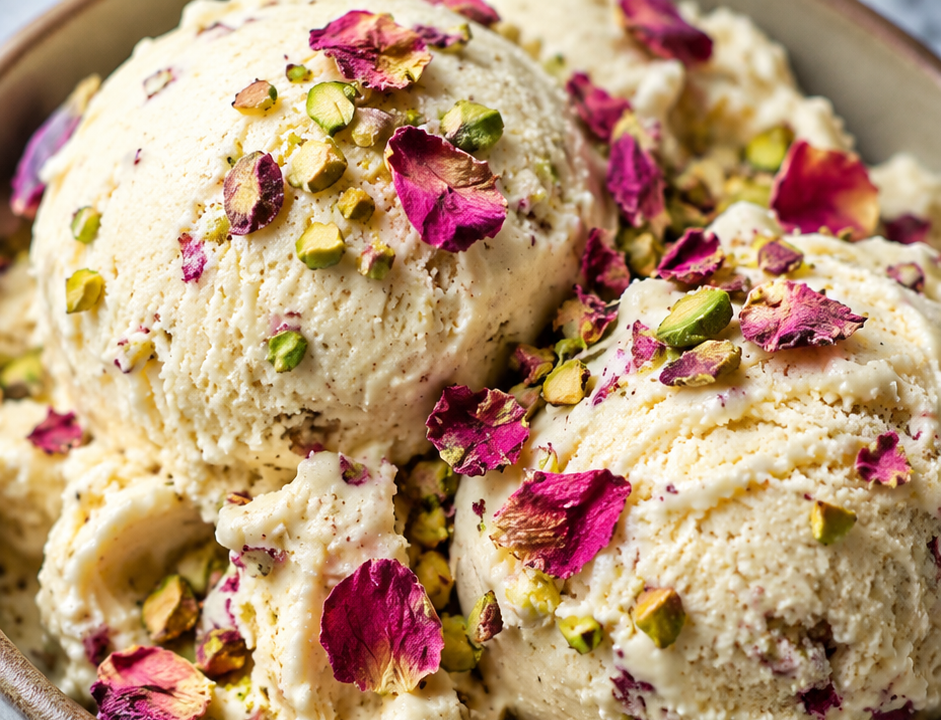
If you’re craving a dessert that feels fancy yet comes together without an ice cream maker, this Rose Pistachio Cheesecake Ice Cream delivers. Velvety cheesecake base meets fragrant rose and crunchy pistachios in every scoop. It is perfect for warm evenings, special gatherings, or when you want to impress without stress.
The combination creates beautiful contrast: silky smooth texture, floral aroma, and nutty bites. Home cooks love it because it looks stunning in photos and tastes even better than it looks. Busy families and beginners can make it ahead and pull it out whenever a sweet craving hits.
Quick Recipe Snapshot
- Prep Time: 20 minutes
- Cook Time: 0 minutes
- Total Time: 20 minutes active + 6-8 hours freezing
- Servings: 8-10
- Difficulty: Easy
- Best For: Summer desserts, dinner parties, make-ahead treats
- Main Flavor Notes: Floral rose, nutty pistachio, tangy-sweet cheesecake
Why You’ll Love This Rose Pistachio Cheesecake Ice Cream
- Ultra-creamy texture – The cream cheese creates a rich, scoopable consistency that melts slowly on your tongue.
- Balanced flavors – Rose brings delicate perfume while pistachios add satisfying crunch and earthy depth.
- No special equipment needed – Skip the ice cream maker and still get professional results at home.
- Make-ahead friendly – Prepare it days in advance for stress-free entertaining.
- Pinterest-perfect presentation – Swirls of pink and green with pistachio pieces make gorgeous photos.
What Is Rose Pistachio Cheesecake Ice Cream?
This dessert blends the tangy creaminess of cheesecake with the cool refreshment of homemade ice cream. It features a simple no-churn base enriched with cream cheese, then flavored with rose water and studded with toasted pistachios. The result feels luxurious yet approachable.
Beginners appreciate how the recipe relies on basic mixing techniques. The cheesecake element adds body and prevents iciness, while rose and pistachio create an elegant flavor profile popular in many fusion desserts. One bite delivers cool creaminess followed by fragrant floral notes and crunchy texture contrast.
Recipe Inspiration
Rose and pistachio is a classic pairing in Middle Eastern and South Asian sweets, where these ingredients appear in puddings, cakes, and traditional ice creams. This version draws inspiration from those flavor combinations and adds a creamy cheesecake twist for a modern no-churn American-style frozen dessert. It keeps the spirit of fragrant, nutty sweets while staying simple for home kitchens.
Ingredients You’ll Need
Cheesecake Ice Cream Base
- 8 ounces (226g) full-fat cream cheese, softened: Provides the signature tangy cheesecake flavor and smooth body.
- 14 ounces (1 can / 397g) sweetened condensed milk: Sweetens naturally and creates a creamy, scoopable texture.
- 2 cups (480ml) heavy whipping cream, cold: Whips up to give airy volume and rich mouthfeel.
- 2 tablespoons rose water: Delivers the beautiful floral aroma (start with 1.5 tbsp if you prefer milder).
- 1 teaspoon pure vanilla extract: Rounds out and deepens all the flavors.
- 1/4 teaspoon salt: Balances sweetness and enhances the rose and pistachio notes.
Mix-ins and Toppings
- 3/4 cup (100g) shelled pistachios, roughly chopped and lightly toasted: Adds crunch, color, and nutty flavor.
- 1-2 drops pink or red food coloring (optional): Creates pretty pastel swirls.
- 2 tablespoons crushed graham crackers or shortbread cookies (optional): Mimics cheesecake crust in every bite.
- Edible dried rose petals (for garnish): Adds beautiful visual appeal and extra floral hint.
How to Make Rose Pistachio Cheesecake Ice Cream
Step 1: Prepare the cream cheese base Beat the softened cream cheese in a large bowl until completely smooth, about 1-2 minutes. Add the sweetened condensed milk, rose water, vanilla extract, and salt. Beat on medium speed until silky and well combined. Scrape down the sides as needed. Taste and adjust rose water if you want a stronger floral note.
Step 2: Whip the cream In a separate chilled bowl, whip the cold heavy cream with an electric mixer until stiff peaks form, about 3-4 minutes. The cream should hold its shape but still look glossy.
Step 3: Fold everything together Gently fold one-third of the whipped cream into the cream cheese mixture to lighten it. Then carefully fold in the remaining whipped cream until no streaks remain. Keep the motion gentle to preserve air for a light texture. Add food coloring if using and swirl lightly.
Step 4: Add the pistachios Fold in most of the chopped pistachios and optional cookie crumbs. Reserve a small handful for topping.
Step 5: Freeze Transfer the mixture to a 9×5-inch loaf pan or freezer-safe container. Smooth the top, sprinkle with reserved pistachios and rose petals. Cover tightly with plastic wrap and freeze for at least 6 hours, preferably overnight, until firm.
Step 6: Serve Let the ice cream sit at room temperature for 5-10 minutes before scooping for the easiest, creamiest texture.
The Simple Cooking Science Behind This Recipe
Whipping the heavy cream incorporates air that gives the ice cream its light, creamy texture instead of a dense, icy block. The cream cheese and condensed milk lower the freezing point and add fat, which prevents large ice crystals from forming. This combination is why no-churn recipes work so well at home.
Rose water is delicate and can taste soapy if overused, so starting small and tasting lets you control the balance. Toasting pistachios briefly in a dry pan wakes up their natural oils and flavor, making them taste richer against the sweet base. Acid from the cream cheese also helps cut through richness for a more refreshing final bite.
Expert Tips for Best Results
- Use full-fat cream cheese and heavy cream for the creamiest texture — low-fat versions freeze harder and taste less rich.
- Soften cream cheese fully but keep heavy cream very cold for best volume when whipping.
- Toast pistachios at 350°F (175°C) for 5-7 minutes to boost flavor without burning.
- Press plastic wrap directly on the surface before freezing to prevent ice crystals.
- For cleaner scoops, run your ice cream scoop under hot water between servings.
- Taste the base mixture before freezing — flavors dull slightly when frozen, so a touch stronger is better.
- Work quickly during folding steps to keep everything cold and airy.
Easy Variations
- Spiced Version: Add 1/4 teaspoon ground cardamom to the base for warm, aromatic depth.
- Berry Swirl: Fold in 1/3 cup raspberry or strawberry jam for fruity contrast and pretty pink ribbons.
- Chocolate Pistachio: Stir in 1/2 cup mini chocolate chips or swirl in chocolate fudge sauce.
- Lighter Version: Use half the cream cheese and add Greek yogurt for tang with fewer calories.
- Kid-Friendly: Reduce rose water to 1 teaspoon and add extra cookie crumbs for a cookies-and-cream vibe.
- Party Style: Layer in a trifle dish with cake pieces and extra rose petals for an elegant frozen dessert.
What to Serve With Rose Pistachio Cheesecake Ice Cream
- Warm baklava or honey-soaked pastries for temperature contrast.
- Fresh berries or mango slices for bright fruit pairing.
- Shortbread cookies or ladyfingers for dipping.
- Turkish coffee or cardamom chai on the side.
- For parties, serve in pretty bowls with extra pistachios and rose petals.
- Pair with a cheese board for an upscale dessert spread.
- Add to brownies or chocolate cake for an ice cream sandwich twist.
How to Store and Reheat
Store the ice cream covered in the freezer for up to 2 weeks. After that, texture may start to change slightly. It does not need reheating — simply let it soften at room temperature for 5-10 minutes before serving.
For make-ahead convenience, prepare up to 3 days before serving. Freezing is ideal here, as this is a frozen dessert. Avoid storing in the refrigerator, as it will melt. If the ice cream becomes too hard, let it sit out longer rather than microwaving.
Common Mistakes to Avoid
- Adding too much rose water makes the flavor soapy — start small and taste.
- Skipping the folding technique properly deflates the whipped cream and leads to dense ice cream.
- Using warm cream cheese or cream prevents proper whipping and creates a heavy texture.
- Not covering tightly during freezing causes freezer burn and off flavors.
- Serving straight from the freezer makes scooping difficult and texture too firm.
- Forgetting to toast pistachios results in milder nut flavor.
Frequently Asked Questions
Can I make this without rose water? Yes. Substitute with 1 teaspoon almond extract plus extra vanilla for a delicious pistachio cheesecake version.
How do I make it dairy-free? Use dairy-free cream cheese, coconut condensed milk, and full-fat coconut cream. Results will be slightly different but still tasty.
Does this recipe need an ice cream maker? No. The no-churn method works beautifully with the cream cheese base.
Can I use pistachio extract instead? Yes, add 1/2 teaspoon pistachio extract along with the rose water for stronger nut flavor.
How long does it last in the freezer? Best enjoyed within 1-2 weeks for optimal texture and flavor.
What if I don’t have heavy cream? You can try half-and-half but the texture will be less creamy. Full-fat coconut cream works for a dairy-free alternative.
Nutrition Facts
Nutrition information is approximate and may vary based on exact ingredients and portion sizes. Per serving (about 1/2 cup): 320 calories, 24g fat, 22g carbohydrates, 1g fiber, 18g sugar, 6g protein.
This Rose Pistachio Cheesecake Ice Cream brings together beautiful flavors and easy preparation in one irresistible dessert. Save this recipe for your next gathering or quiet evening treat. Try one of the variations and enjoy every creamy, fragrant scoop.


