



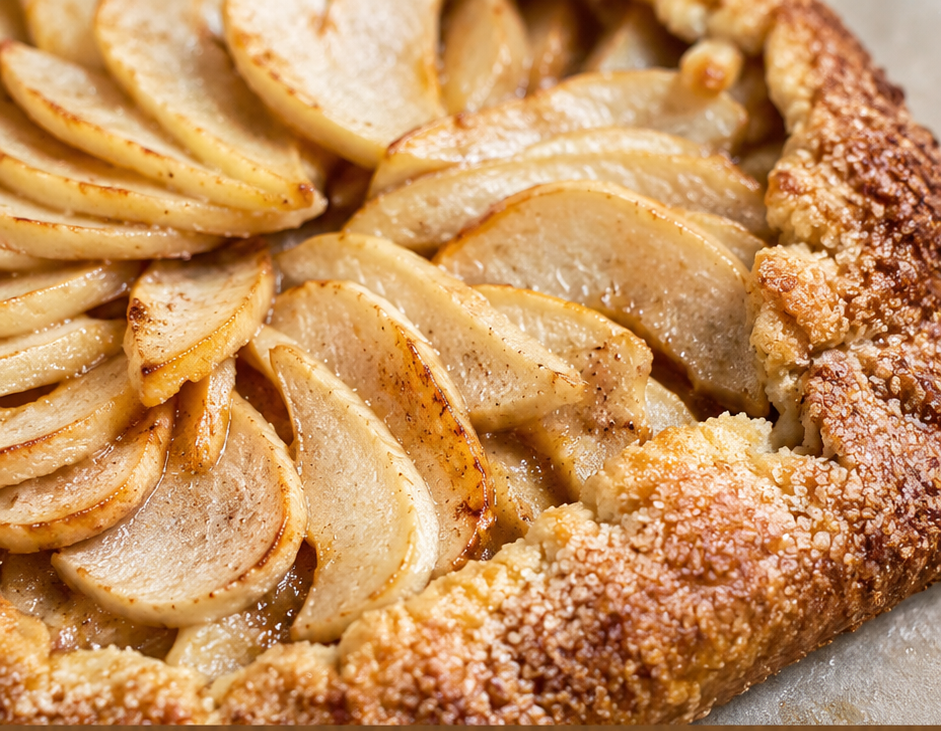
If you’re craving a cozy homemade dessert that looks bakery-worthy but comes together easily, this rustic pear galette is your answer. Juicy pears tucked into a buttery, flaky crust with warm spices create the perfect balance of sweet and tangy in every bite.
The free-form shape makes it forgiving for beginners while delivering impressive results. Whether you’re hosting friends or treating your family on a weekend, this galette turns simple ingredients into something special. It’s the kind of recipe that feels fancy yet stays relaxed and practical for home cooks.
Quick Recipe Snapshot
- Prep Time: 25 minutes
- Cook Time: 40 minutes
- Total Time: 1 hour 5 minutes (plus optional chilling)
- Servings: 6-8
- Difficulty: Easy
- Best For: Weeknight treats, holiday gatherings, brunch, or special weekends
- Main Flavor Notes: Sweet-tart pears, warm cinnamon, buttery crust with golden edges
Why You’ll Love This Rustic Pear Galette
- Flaky crust every time — Cold butter creates tender layers without any fancy techniques.
- Naturally beautiful — The rustic edges and glistening fruit make stunning photos for Pinterest.
- Beginner-friendly — No pie pan or perfect crimping needed; it’s supposed to look handmade.
- Crowd-pleaser — Mild sweetness works for both kids and adults at family dinners.
- Make-ahead flexible — Prep the dough and filling ahead for stress-free baking.
What Is a Rustic Pear Galette?
A galette is a French-style free-form tart baked on a sheet pan. Unlike traditional pies, it has a relaxed, open shape that celebrates imperfection. Pears bring soft, juicy texture and gentle sweetness that pairs beautifully with a simple pastry crust.
This version keeps things straightforward with fresh pears, warm spices, and a touch of lemon for brightness. The crust turns golden and crisp while the fruit softens into jammy pockets. It strikes the perfect balance between elegant and everyday.
Recipe Inspiration
This recipe draws from classic French rustic tarts that highlight seasonal fruit in a simple pastry. Pears have long been used in European baking for their subtle flavor and lovely texture when baked. We keep the spirit alive with minimal ingredients that let the fruit shine while adding home-cook-friendly shortcuts like store-bought puff pastry as an option for even faster prep.
Ingredients You’ll Need
For the Crust:
- 1 ½ cups (190g) all-purpose flour: Forms the base structure.
- ½ teaspoon salt: Enhances flavor without tasting salty.
- 1 tablespoon granulated sugar: Helps with browning and tenderness.
- ½ cup (113g) cold unsalted butter, cubed: Creates flaky layers.
- 4-6 tablespoons ice water: Brings dough together without making it tough.
For the Pear Filling:
- 4 medium ripe but firm pears (about 2 pounds / 900g), thinly sliced: Main fruit that softens beautifully.
- 2 tablespoons fresh lemon juice: Prevents browning and brightens flavor.
- ⅓ cup (65g) granulated sugar: Sweetens gently without overpowering the pears.
- 2 tablespoons cornstarch: Thickens juices to prevent soggy crust.
- 1 teaspoon ground cinnamon: Adds warm aroma.
- ¼ teaspoon ground nutmeg: Complements pears with subtle depth.
- 1 teaspoon vanilla extract: Rounds out flavors.
For Finishing:
- 1 egg, beaten (for egg wash): Gives golden shine.
- 1 tablespoon coarse sugar (like turbinado): Adds sparkle and crunch.
- Optional: 2 tablespoons apricot jam, warmed: For glossy finish after baking.
How to Make Rustic Pear Galette
Make the Dough Combine flour, salt, and sugar in a large bowl. Cut in cold butter with a pastry cutter or your fingers until pea-sized crumbs form. Add ice water one tablespoon at a time until dough just holds together. Form into a disk, wrap in plastic, and chill for at least 30 minutes. Cold butter is key for flakiness.
Prepare the Filling Slice pears thinly and toss immediately with lemon juice. Add sugar, cornstarch, cinnamon, nutmeg, and vanilla. Gently mix until pears are evenly coated. Let sit 10 minutes so juices start to release.
Assemble the Galette Preheat oven to 400°F (200°C). Roll chilled dough on lightly floured parchment into a 12-14 inch circle. Transfer parchment and dough to a baking sheet. Arrange pear slices in the center, leaving a 2-inch border. Fold edges over fruit, overlapping as needed. Brush crust with egg wash and sprinkle with coarse sugar.
Bake to Perfection Bake 38-45 minutes until crust is deep golden and pears are tender and bubbling. Rotate pan halfway for even browning. Cool on the sheet for 15 minutes before sliding onto a serving board.
The Simple Cooking Science Behind This Recipe
Cold butter in the crust creates steam pockets as it melts in the hot oven, leading to those irresistible flaky layers. Chilling the dough relaxes gluten so the crust stays tender rather than tough.
Cornstarch mixed with pear juices thickens during baking to create a glossy, jammy filling that stays put instead of running everywhere. The high heat sets the crust quickly while gently cooking the fruit to soft perfection without turning it to mush.
Expert Tips for Best Results
- Choose firm-ripe pears like Bosc or Anjou that hold shape when sliced.
- Keep everything cold until baking for the flakiest crust.
- Don’t skip the parchment paper — it makes transferring easy.
- Taste your pears first. Sweeter pears may need less sugar.
- Bake on the lower-middle oven rack for crisp bottom crust.
- Let it cool slightly before slicing so juices settle.
- For extra shine, brush warm apricot jam over pears after baking.
Easy Variations
- Apple Pear Galette — Swap half the pears with thinly sliced apples.
- Cheesy Version — Scatter crumbled goat cheese or blue cheese over pears before folding.
- Nutty Twist — Sprinkle toasted sliced almonds on the filling for crunch.
- Spiced Ginger — Add ½ teaspoon ground ginger and a pinch of cardamom.
- Gluten-Free — Use your favorite gluten-free pie crust mix.
- Mini Galettes — Divide dough into 6 portions for individual servings.
What to Serve With Rustic Pear Galette
Pair with vanilla ice cream or lightly sweetened whipped cream. Serve alongside coffee or tea for afternoon gatherings. For brunch, add it to a board with cheeses and nuts. It shines next to roasted pork or alongside a simple green salad with vinaigrette. Great for potlucks, holiday dessert tables, or cozy family nights.
How to Store and Reheat
Store leftovers covered at room temperature for 1 day or in the fridge up to 3 days. Freezing is possible but not ideal — the crust softens and fruit can become watery. For best texture, enjoy fresh or refrigerated.
To reheat, warm slices in a 350°F oven for 8-10 minutes. Avoid the microwave as it makes the crust soggy. Make the dough up to 2 days ahead and keep chilled for easy assembly.
Common Mistakes to Avoid
- Using warm butter in the crust leads to a tough or greasy result. Keep it cold.
- Overfilling the center causes juices to spill. Leave a generous border.
- Skipping the egg wash results in pale crust. It makes a big visual difference.
- Cutting pears too thick prevents even cooking. Aim for thin, uniform slices.
- Baking at too low temperature keeps the crust from crisping properly.
- Not cooling slightly before slicing causes filling to run out.
Frequently Asked Questions
Can I use store-bought crust? Yes! Thaw puff pastry or refrigerated pie crust for an even faster version.
What if my pears are very ripe? They’ll work but may release more juice. Add an extra teaspoon of cornstarch.
Can I make this ahead? Assemble up to 4 hours ahead, cover, and refrigerate. Bake fresh for best texture.
Is this recipe very sweet? No — it stays balanced with natural pear sweetness and bright lemon.
Can I freeze the unbaked galette? Yes. Freeze on the tray until solid, wrap well, and bake from frozen adding 10-15 extra minutes.
What other fruits work well? Apples, plums, peaches, or mixed berries all adapt beautifully.
Nutrition Facts
Approximate values per serving (based on 8 servings). Nutrition is approximate and may vary by exact ingredients and brands used.
- Calories: 285
- Total Fat: 14g
- Saturated Fat: 8g
- Carbohydrates: 38g
- Fiber: 3g
- Sugars: 18g
- Protein: 3g
This rustic pear galette brings simple joy to the table with minimal effort and maximum charm. Save this recipe for your next gathering or quiet evening treat. Try one of the variations and enjoy the warm, fragrant results fresh from your oven.


